Writing integration tests with Testcontainers
Integration-testing any app is a tricky business especially when your app has external dependencies. You need to make sure that all these external dependencies are available at the same place and always in the same state. But thanks to Testcontainers, a lot of these tricky things are taken care so you always have your external dependency available (of course, at the same place and in the same state you desire). In this article, we are going to create a simple test container which will help us understand how Testcontainers work while familiarising us with the basic Testcontainers API.
Setting up the scene
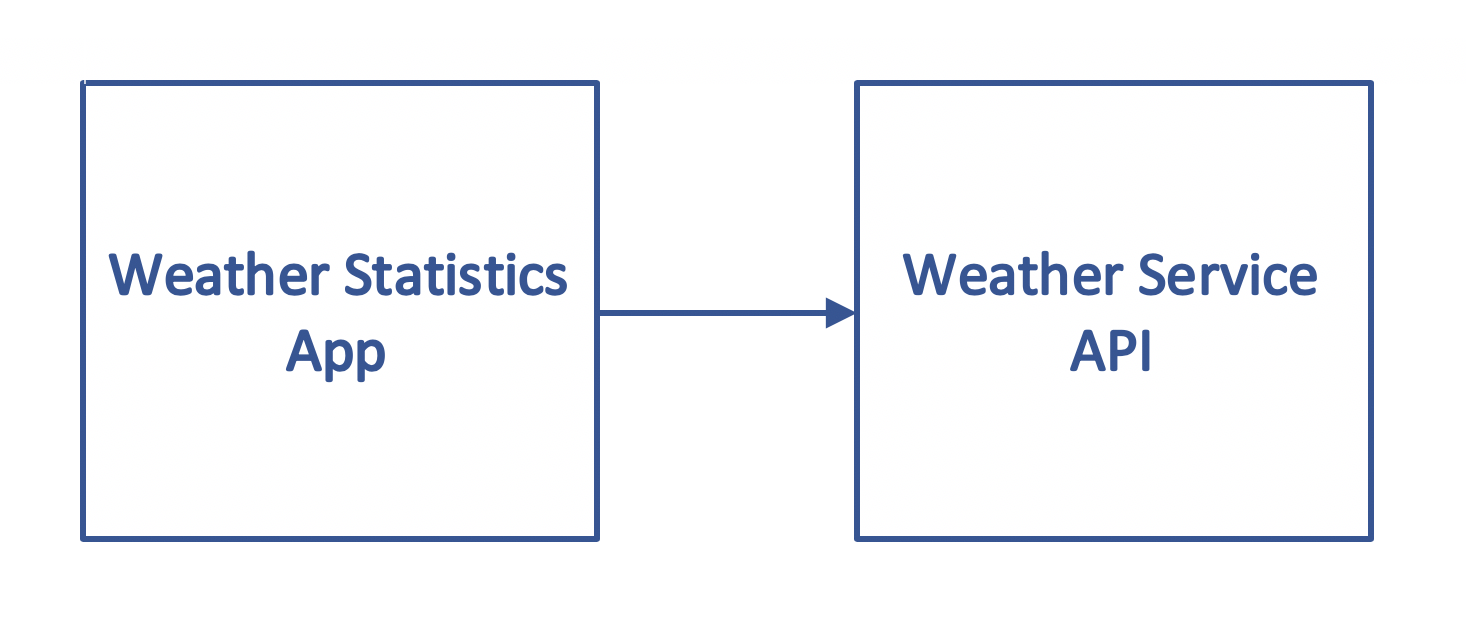
What we are going to create is (part of) a Weather Statistics app. This app makes use of an API (Weather Service API). A simple schematic of the dependency is shown below:

The Weather Service API makes an endpoint available where we can GET the temperature forecast for the next 24 hours. A sample response looks like this:
  "forecast" : [
    {"offset" : 1, "temperature" :  28},
    {"offset" : 2, "temperature" :  29},
    {"offset" : 3, "temperature" :  29},
    {"offset" : 4, "temperature" :  30},
    {"offset" : 5, "temperature" :  30},
    ....
    {"offset" : 23, "temperature" :  27},
    {"offset" : 24, "temperature" :  27}
  ]
In our Weather Statistics app, we have a class WeatherStatsService which uses the above endpoint and makes some calculation to get maximum and minimum temperature (for the next 24 hours). Below code snippet explains this:
@Service
public class WeatherStatsService {

    @Value("${weatherservice.host}")
    private String host;
    @Value("${weatherservice.port}")
    private String port;

    private final RestTemplate restTemplate = new RestTemplateBuilder().build();

    public WeatherStats getWeatherStats() {
        final String url = "http://" + host + ":" + port + "/forecast24hours";

        final DayForecast dayForecast = restTemplate.getForEntity(url, DayForecast.class).getBody();
        final int max = dayForecast.getForecast().stream()
                          .map(HourForecast::getTemperature)
                          .max(Integer::compare)
                          .get();
        final int min = dayForecast.getForecast().stream()
                          .map(HourForecast::getTemperature)
                          .min(Integer::compare)
                          .get();

        return new WeatherStats(max, min);
    }

    @Data
    static class DayForecast {
        private List<HourForecast> forecast;
    }

    @Data
    static class HourForecast {
        private int offset;
        private int temperature;
    }

    @Data
    @AllArgsConstructor
    static class WeatherStats {
        private int max;
        private int min;
    }
}Note: Source code for this article is available at: https://github.com/balkrishnarawool/testcontainers-json-server
What we want to do here is write an integration test for WeatherStatsService which also has a connection to Weather Service API. We will achieve this by creating a custom container for our Weather Service API.
json-server
Let’s take a few minutes to understand how we are going to make an API available. For that we are going to use an npm module: json-server (yes, an npm module!) But don’t worry. You don’t need to know anything about npm, NodeJS or even JavaScript. json-server is a project that helps in creating mock REST API very fast. Luckily there is a docker image (clue/json-server) available on docker-hub for it so we can get it up and running quickly.
json-server requires that we store all our mock responses in a json file (usually named db.json). So in your current directory create a file db.json with this content:
{
  "forecast24hours": {
    "forecast" : [
      {"offset" : 1, "temperature" :  28},
      {"offset" : 2, "temperature" :  29},
      {"offset" : 3, "temperature" :  29},
      {"offset" : 4, "temperature" :  30},
      {"offset" : 5, "temperature" :  30},
      {"offset" : 6, "temperature" :  31},
      {"offset" : 7, "temperature" :  32},
      {"offset" : 8, "temperature" :  32},
      {"offset" : 9, "temperature" :  32},
      {"offset" : 10, "temperature" :  31},
      {"offset" : 11, "temperature" :  30},
      {"offset" : 12, "temperature" :  30},
      {"offset" : 13, "temperature" :  29},
      {"offset" : 14, "temperature" :  28},
      {"offset" : 15, "temperature" :  27},
      {"offset" : 16, "temperature" :  27},
      {"offset" : 17, "temperature" :  26},
      {"offset" : 18, "temperature" :  26},
      {"offset" : 19, "temperature" :  26},
      {"offset" : 20, "temperature" :  26},
      {"offset" : 21, "temperature" :  25},
      {"offset" : 22, "temperature" :  26},
      {"offset" : 23, "temperature" :  27},
      {"offset" : 24, "temperature" :  27}
    ]
  }
}
Now, from the same directory, run this command to get a container with json-server up and running:
docker run -p 80:80 -v $PWD/db.json:/data/db.json clue/json-serverWhen the sever is running, you can go to a browser and check the reponse to this request: http://localhost:80/forecast24hours and you should see the json you put in the db.json file. This server now represents our Weather Service API. You can now terminate the server by using Control + C. We don’t need to have it running because that is what Testcontainers will do. We just did this to understand how json-server works. We are going to ask Testcontainers to make use of this docker image to create a container which we will use for our integration test.
Integration testing with Testcontainers
Now we can write our test class: WeatherStatsServiceIntegrationTest:
@RunWith(SpringRunner.class)
@SpringBootTest(
        classes = WeatherStatsServiceIntegrationTest.TestConfiguration.class
)
public class WeatherStatsServiceIntegrationTest {

    private static GenericContainer jsonServer = new GenericContainer("clue/json-server")
            .withClasspathResourceMapping("db.json","/data/db.json", BindMode.READ_WRITE)
            .withExposedPorts(80)
            .waitingFor(getWaitStrategy());

    private static WaitAllStrategy getWaitStrategy() {
        return new WaitAllStrategy().withStrategy(Wait.forHttp("/").forStatusCode(200));
    }

    @DynamicPropertySource
    public static void setWeatherServiceApiConfig(DynamicPropertyRegistry registry) {
        jsonServer.start();

        registry.add("weatherservice.host", jsonServer::getContainerIpAddress);
        registry.add("weatherservice.port", jsonServer::getFirstMappedPort);
    }

    @Autowired
    private WeatherStatsService weatherStatsService;

    @Test
    public void shouldGetMockedWeatherData() throws Exception {
        final WeatherStatsService.WeatherStats weatherStats = weatherStatsService.getWeatherStats();

        assertEquals(32, weatherStats.getMax());
        assertEquals(25, weatherStats.getMin());
    }

    @EnableAutoConfiguration
    @ComponentScan({"com.balarawool.testcontainers.jsonserver"})
    @Configuration
    static class TestConfiguration {
    }
}
Let’s look at this class in detail. This is a simple @SpringBootTest. We first create an instance of GenericContainer with clue/json-server as docker image. Then we set the resource mapping so that the container knows about our mock-responses file: db.json. Make sure to put this file in resources directory of your test module so SpringBoot can find it on the classpath.
Then we expose port 80. (This is container port. We don’t know yet which port it will be available on the host machine. Testcontainers uses a random available port and we can get which port it is once the container is started.) Then we set the wait-strategy. This is how Testcontainers knows that our container is up and available for use. For our case, we say having a HTTP status of 200 (OK) on the root (“/”) resource is a good enough indication that the server has started.
Then we have a method setWeatherServiceApiConfig() which is annotated with @DynamicPropertySource. This is an indication to Spring Boot that the environment properties can be changed in this method. This is needed because WeatherStatsService connects to the Weather Service API by using the environment properties weatherservice.host and weatherservice.port. These properties are set here by using the jsonServer container instance. At this point the server is started so we have the host and port information.
This is it. The rest of the code in the test class is a test method and SpringBoot configuration.
In our test method, we expect the max and min to be set using the data from our mock in the db.json file. So when we run the test method, a test container is created using the set docker image and with the given configuration, the host and port properties are set using this container instance, WeatherStatsService uses these properties and connects to the container and gets the mock data, does its calculation and thus the test case passes.
Conclusion
As you can see, it is quite easy to write our integration tests using Testcontainers and we don’t have to worry about having consistent availability of external dependencies. This was a simple explanation of that and also an introduction to basic API of Testcontainers. Hope this was useful.
Source code is available here: https://github.com/balkrishnarawool/testcontainers-json-server